

Find and search stores
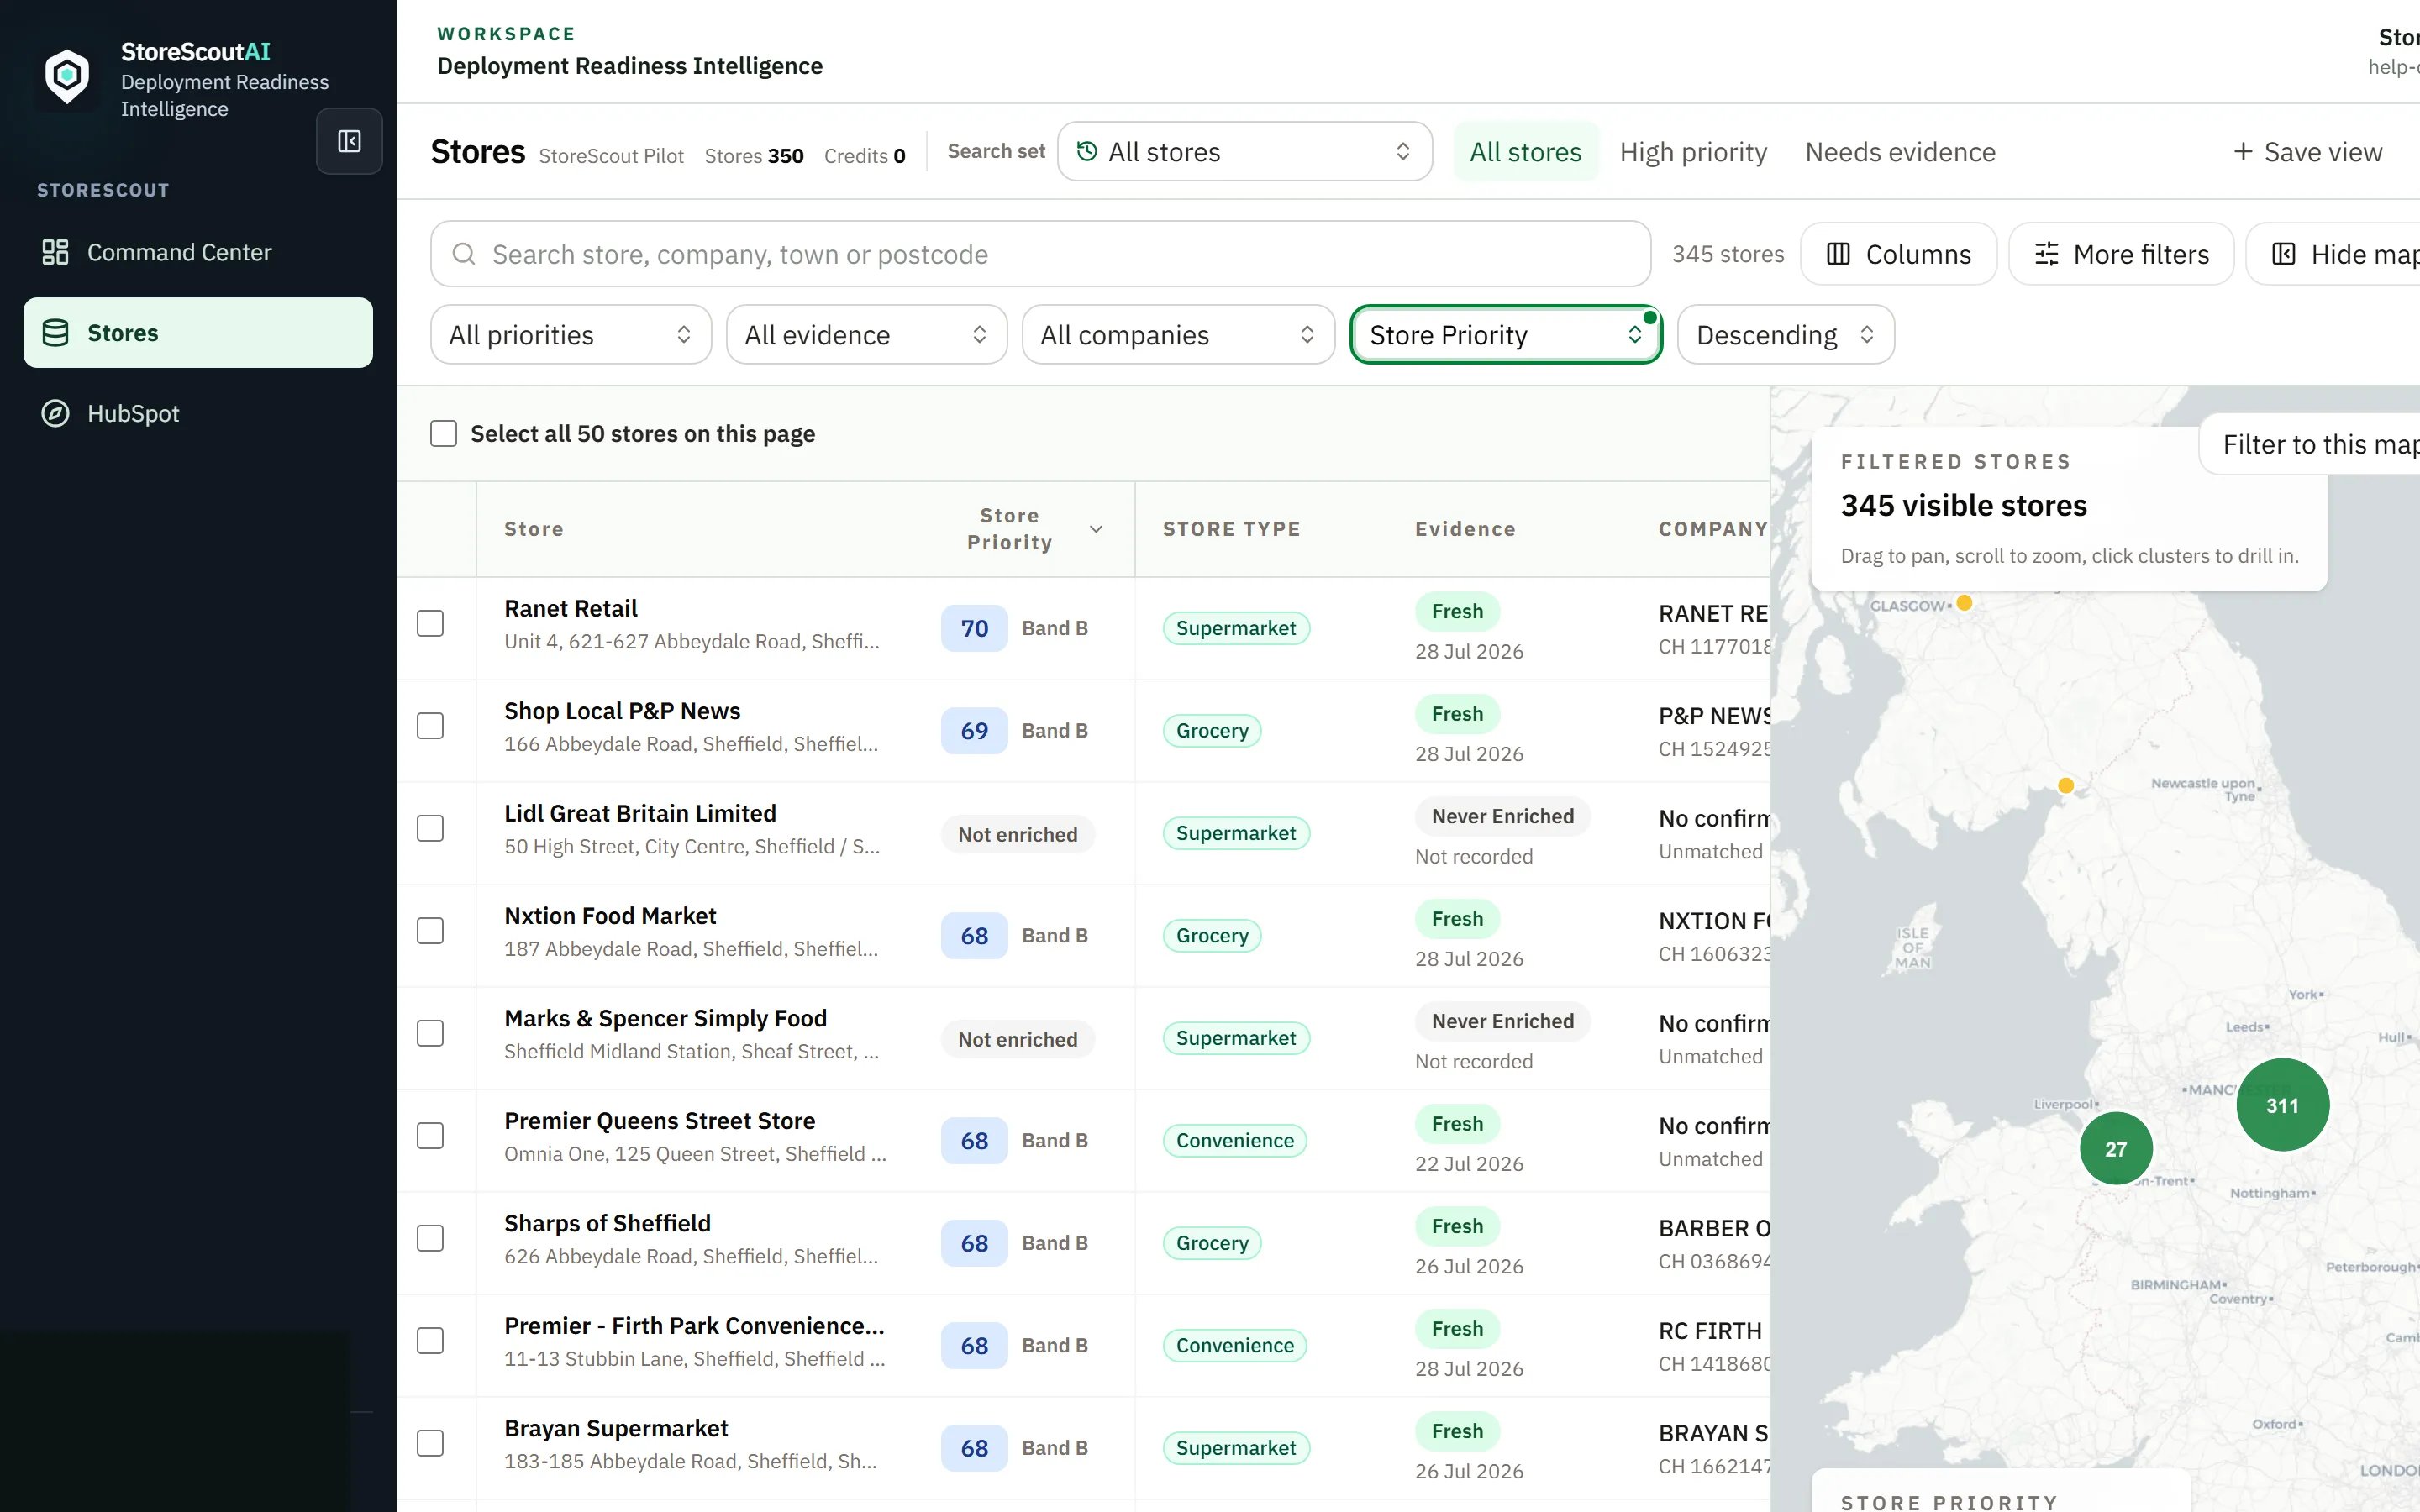
Stores is where day-to-day work happens: search what you already hold, open profiles, build a shortlist — and Find stores when you need to add licensed coverage for an area.
Two different “find” ideas
Section titled “Two different “find” ideas”| In the product | What it does |
|---|---|
| Search box (in Stores) | Filters the stores already in your workspace (name, company, town, postcode). Free and instant. |
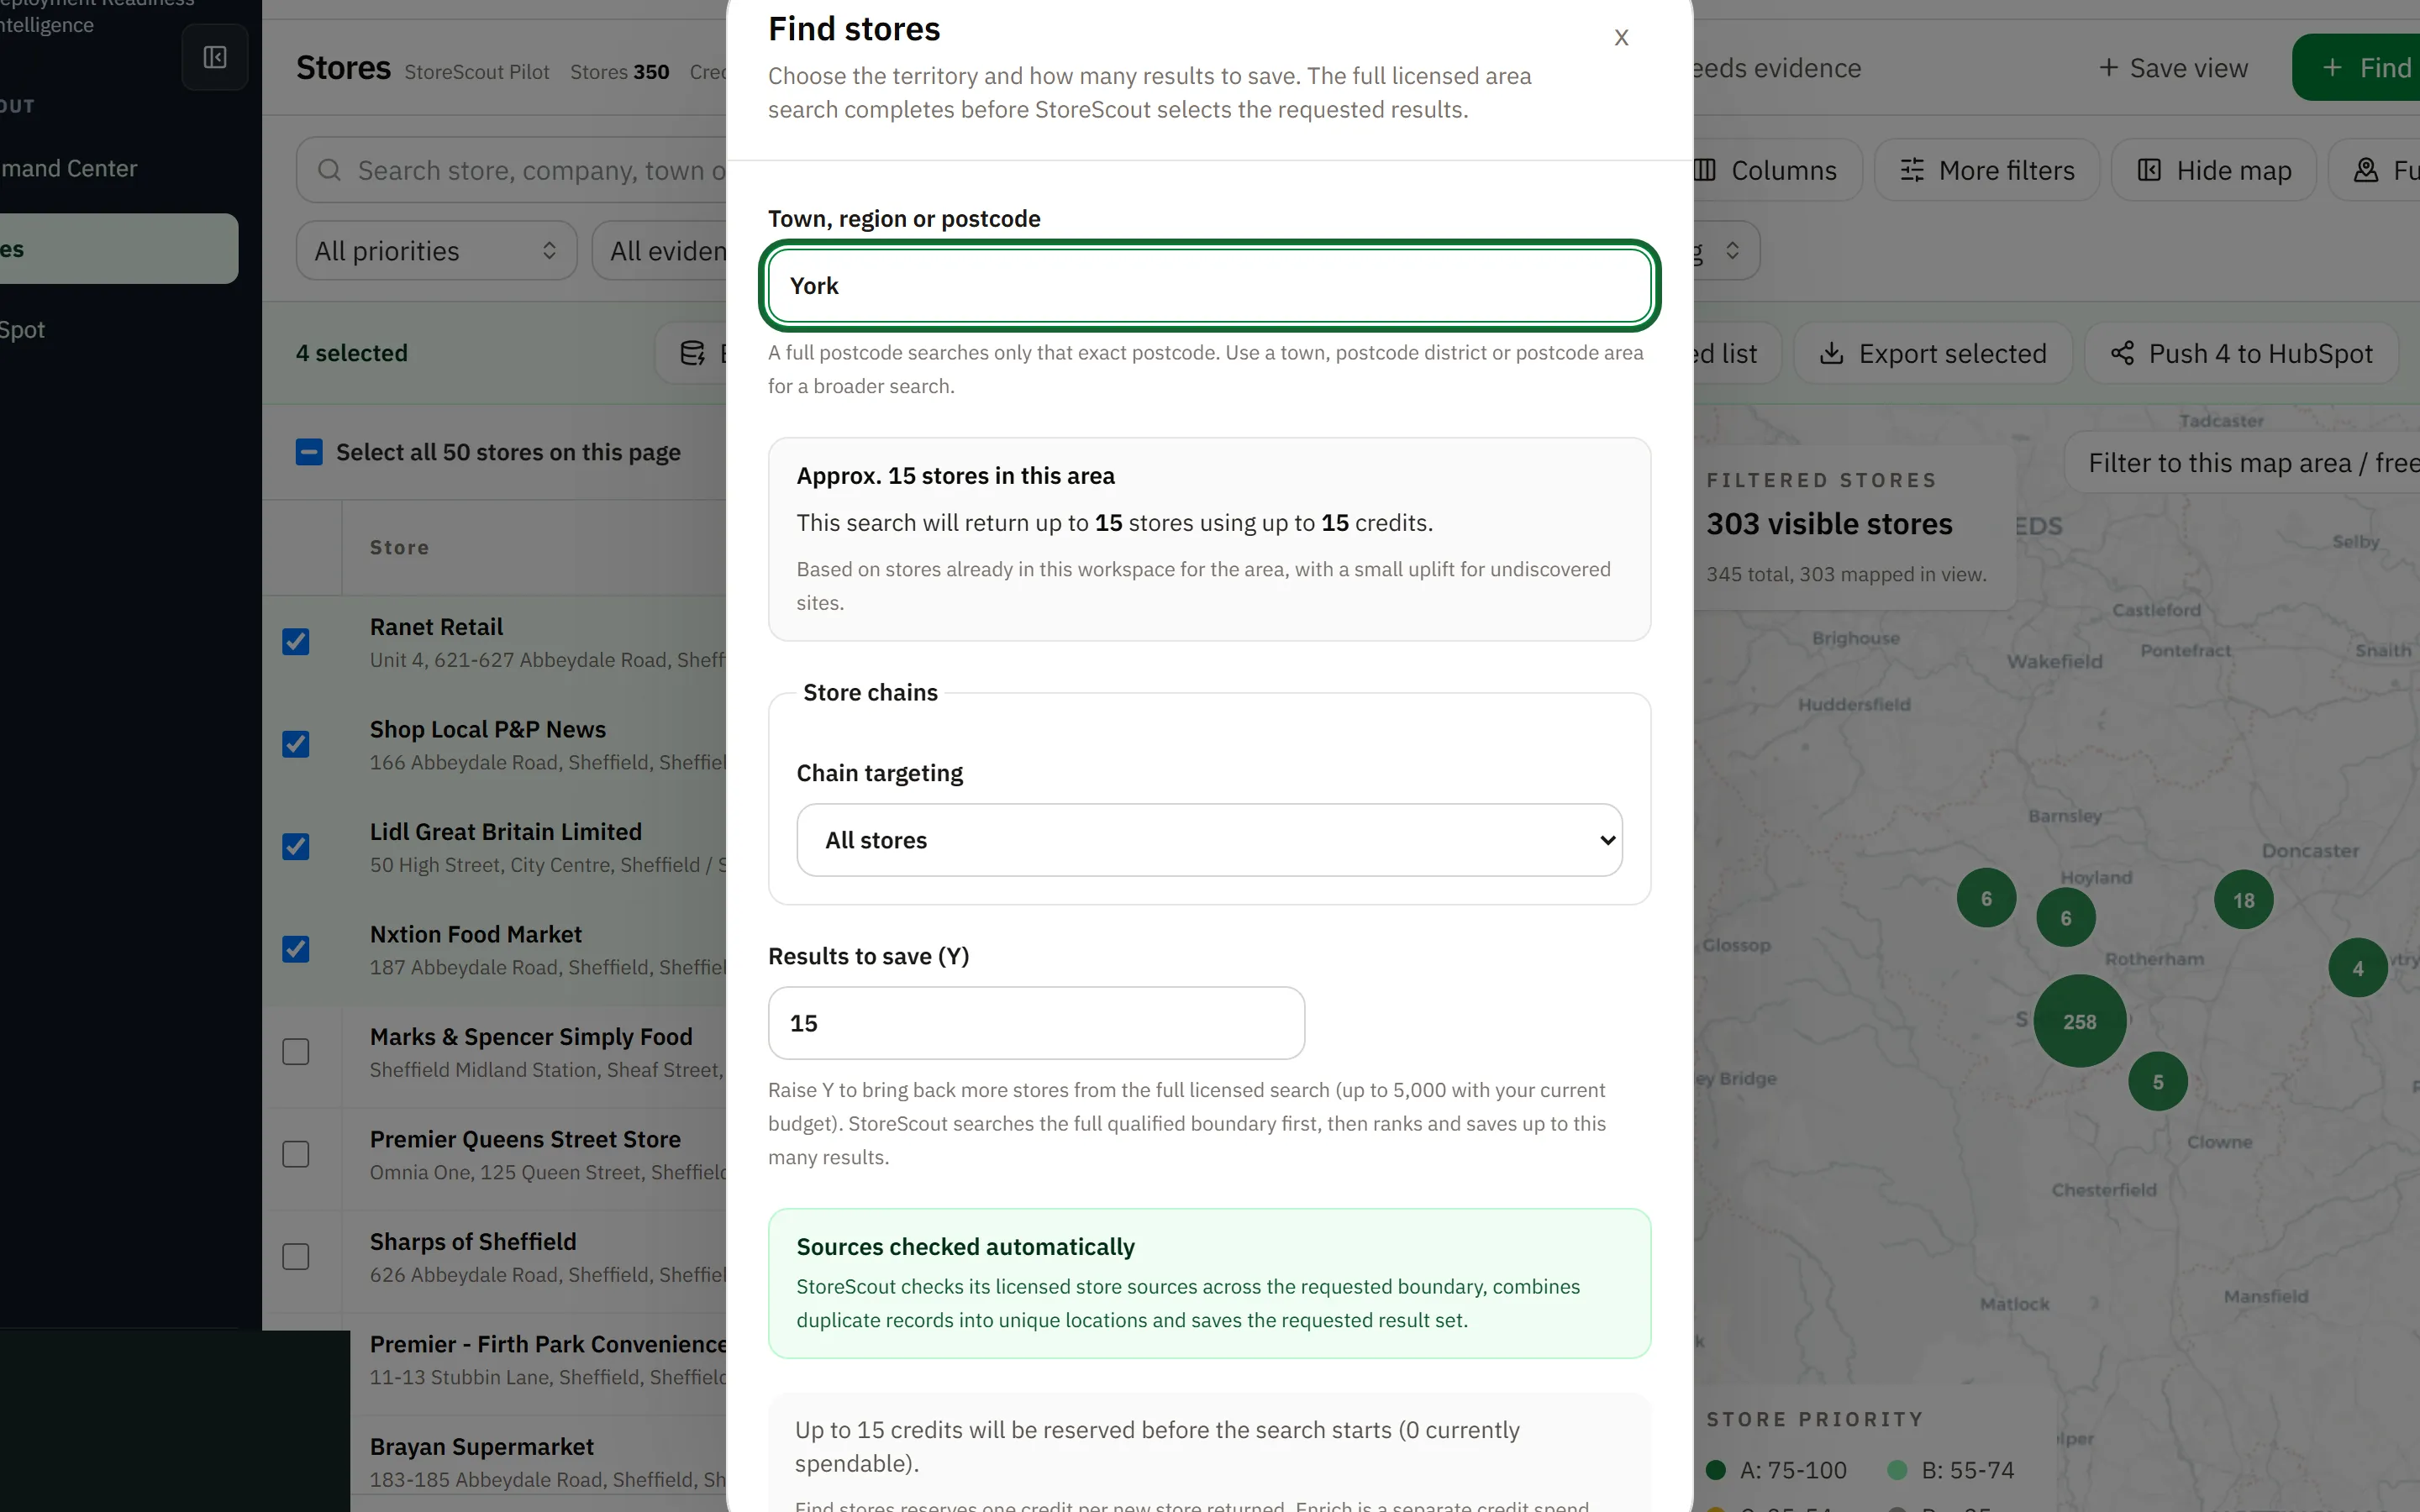
| Find stores (header button) | Starts a licensed area search, estimates coverage, then saves results you choose to keep. Uses credits when configured. |
You only ever see stores your customer is entitled to. Find stores does not unlock unrestricted national data.
Search what you already have
Section titled “Search what you already have”- Open Stores.
- Type in the search box — results update the table and map.
- Optionally restrict to a completed run with Search set (see below).
- Open a store from the name cell or full profile control.
Tips:
- Start broad, then narrow with filters.
- If a store “should” exist but does not appear, check entitlement, Search set, and filters before assuming a data gap — troubleshooting.
Search sets (completed Find stores runs)
Section titled “Search sets (completed Find stores runs)”After a successful Find stores job, results are grouped as a search set.
- Open the Search set control above the table (combobox — type to filter long lists).
- Choose All stores or a named completed search.
- Switching search set updates table and map together.
This replaces older “horizontal chip strips” of every past search.
Find stores (add coverage)
Section titled “Find stores (add coverage)”- Click Find stores (when your role allows — typically admin or analyst).
- Enter the area (place name or postcode-style region as the dialog describes).
- Review the planning estimate and how many results you want to save against your credit balance.
- Confirm to start. An operation banner shows progress while the search runs.
- When complete, use View results (or pick the new search set) to work the saved stores.
Reading the list
Section titled “Reading the list”Typical columns (configurable via Columns):
- Store name and address
- Store Priority / band (attention guide — not a legal outcome)
- Evidence freshness or last enriched
- Company match, fascia, catchment, owner, workflow fields when enabled