

Your first 15 minutes
Use this path the first time you land in StoreScout after sign-in.
1. Orient (2 minutes)
Section titled “1. Orient (2 minutes)”- Confirm you are in the app workspace (
app.storescoutai.co.uk), not the public website. - Navigation is usually Command Center and Stores. You may also see Visits, QR Campaigns, or HubSpot if your customer has those features on.
- Note any demo banner — demo data is for learning; do not treat it as live buyer truth.
2. Open Stores (3 minutes)
Section titled “2. Open Stores (3 minutes)”- Go to Stores.
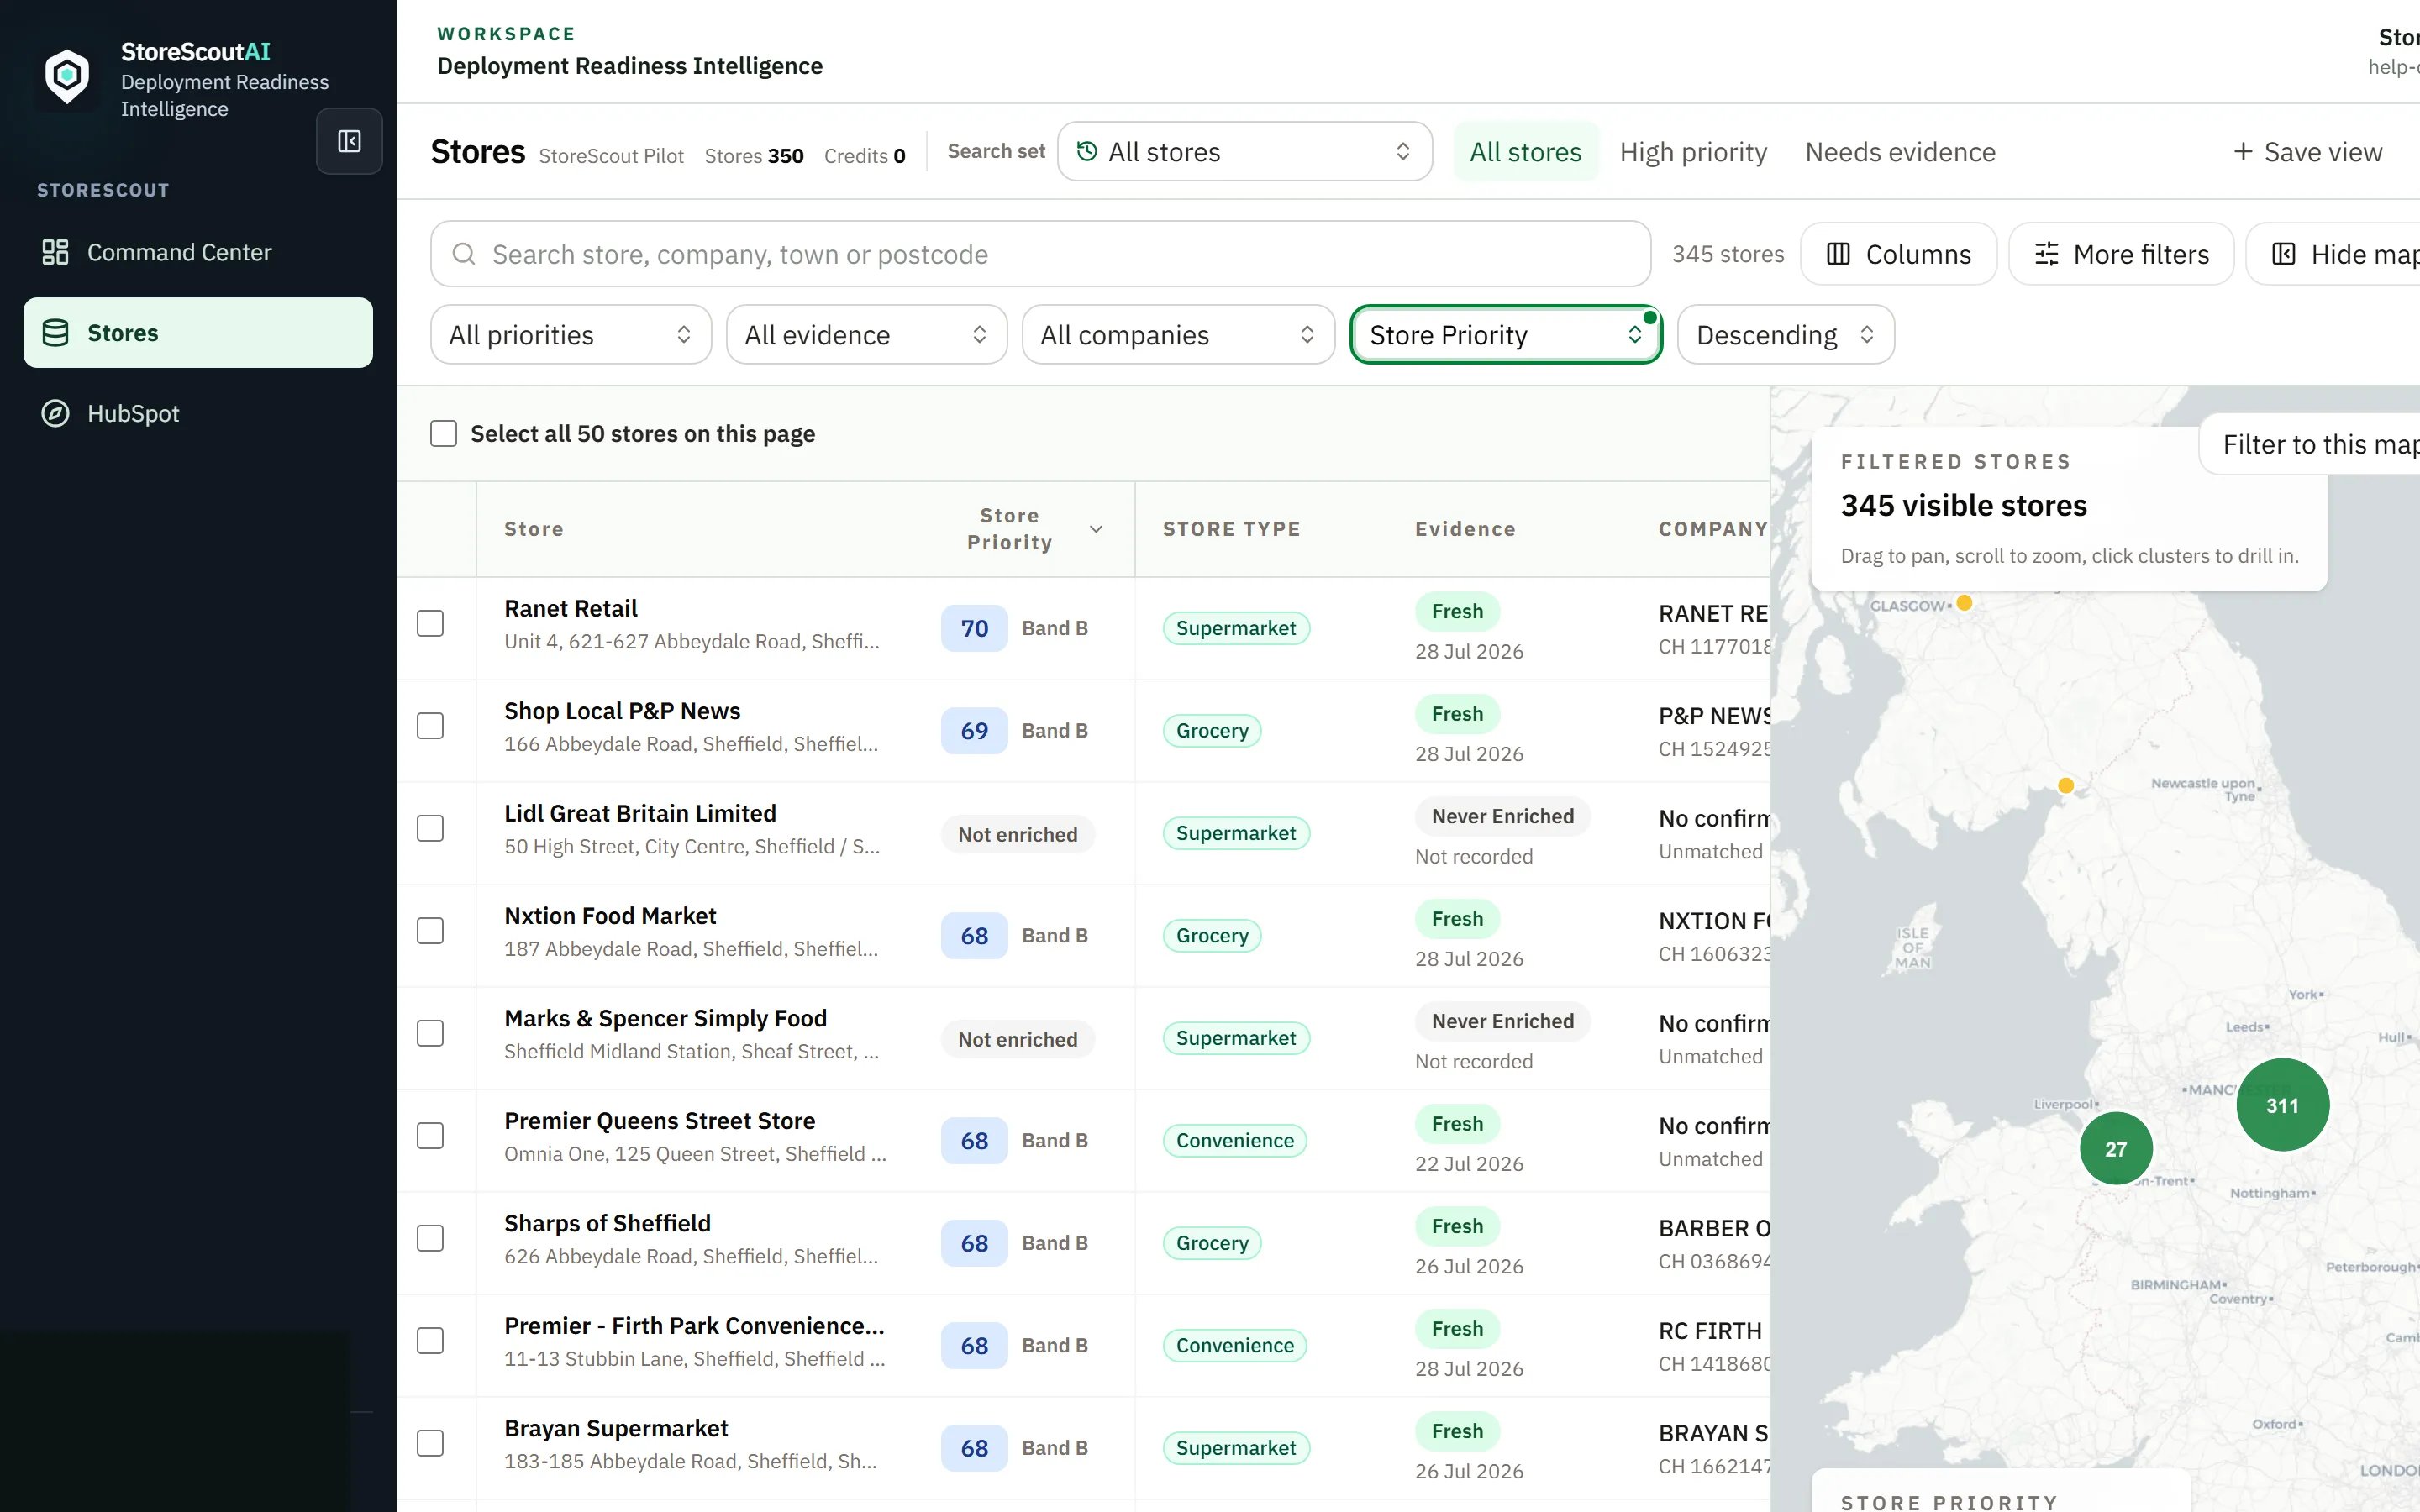
- You should see a table of entitled stores and, in split view, a map.
- Use the top search box for store name, company, town, or postcode.
If the list is empty, jump to Empty results or map issues.
3. Narrow the working set (4 minutes)
Section titled “3. Narrow the working set (4 minutes)”- Use Search set (completed Find stores runs) if your team already saved a territory search — or leave All stores.
- Apply one or two filters (priority, evidence, company match) — active filters show a clear green state.
- Try More filters for fascia, chains, readiness, or saved lists.
- Switch layout if needed: table only, map only, or split (when the Stores pane is wide enough).
Details: Filters and views and Map and list together.
4. Open one store (4 minutes)
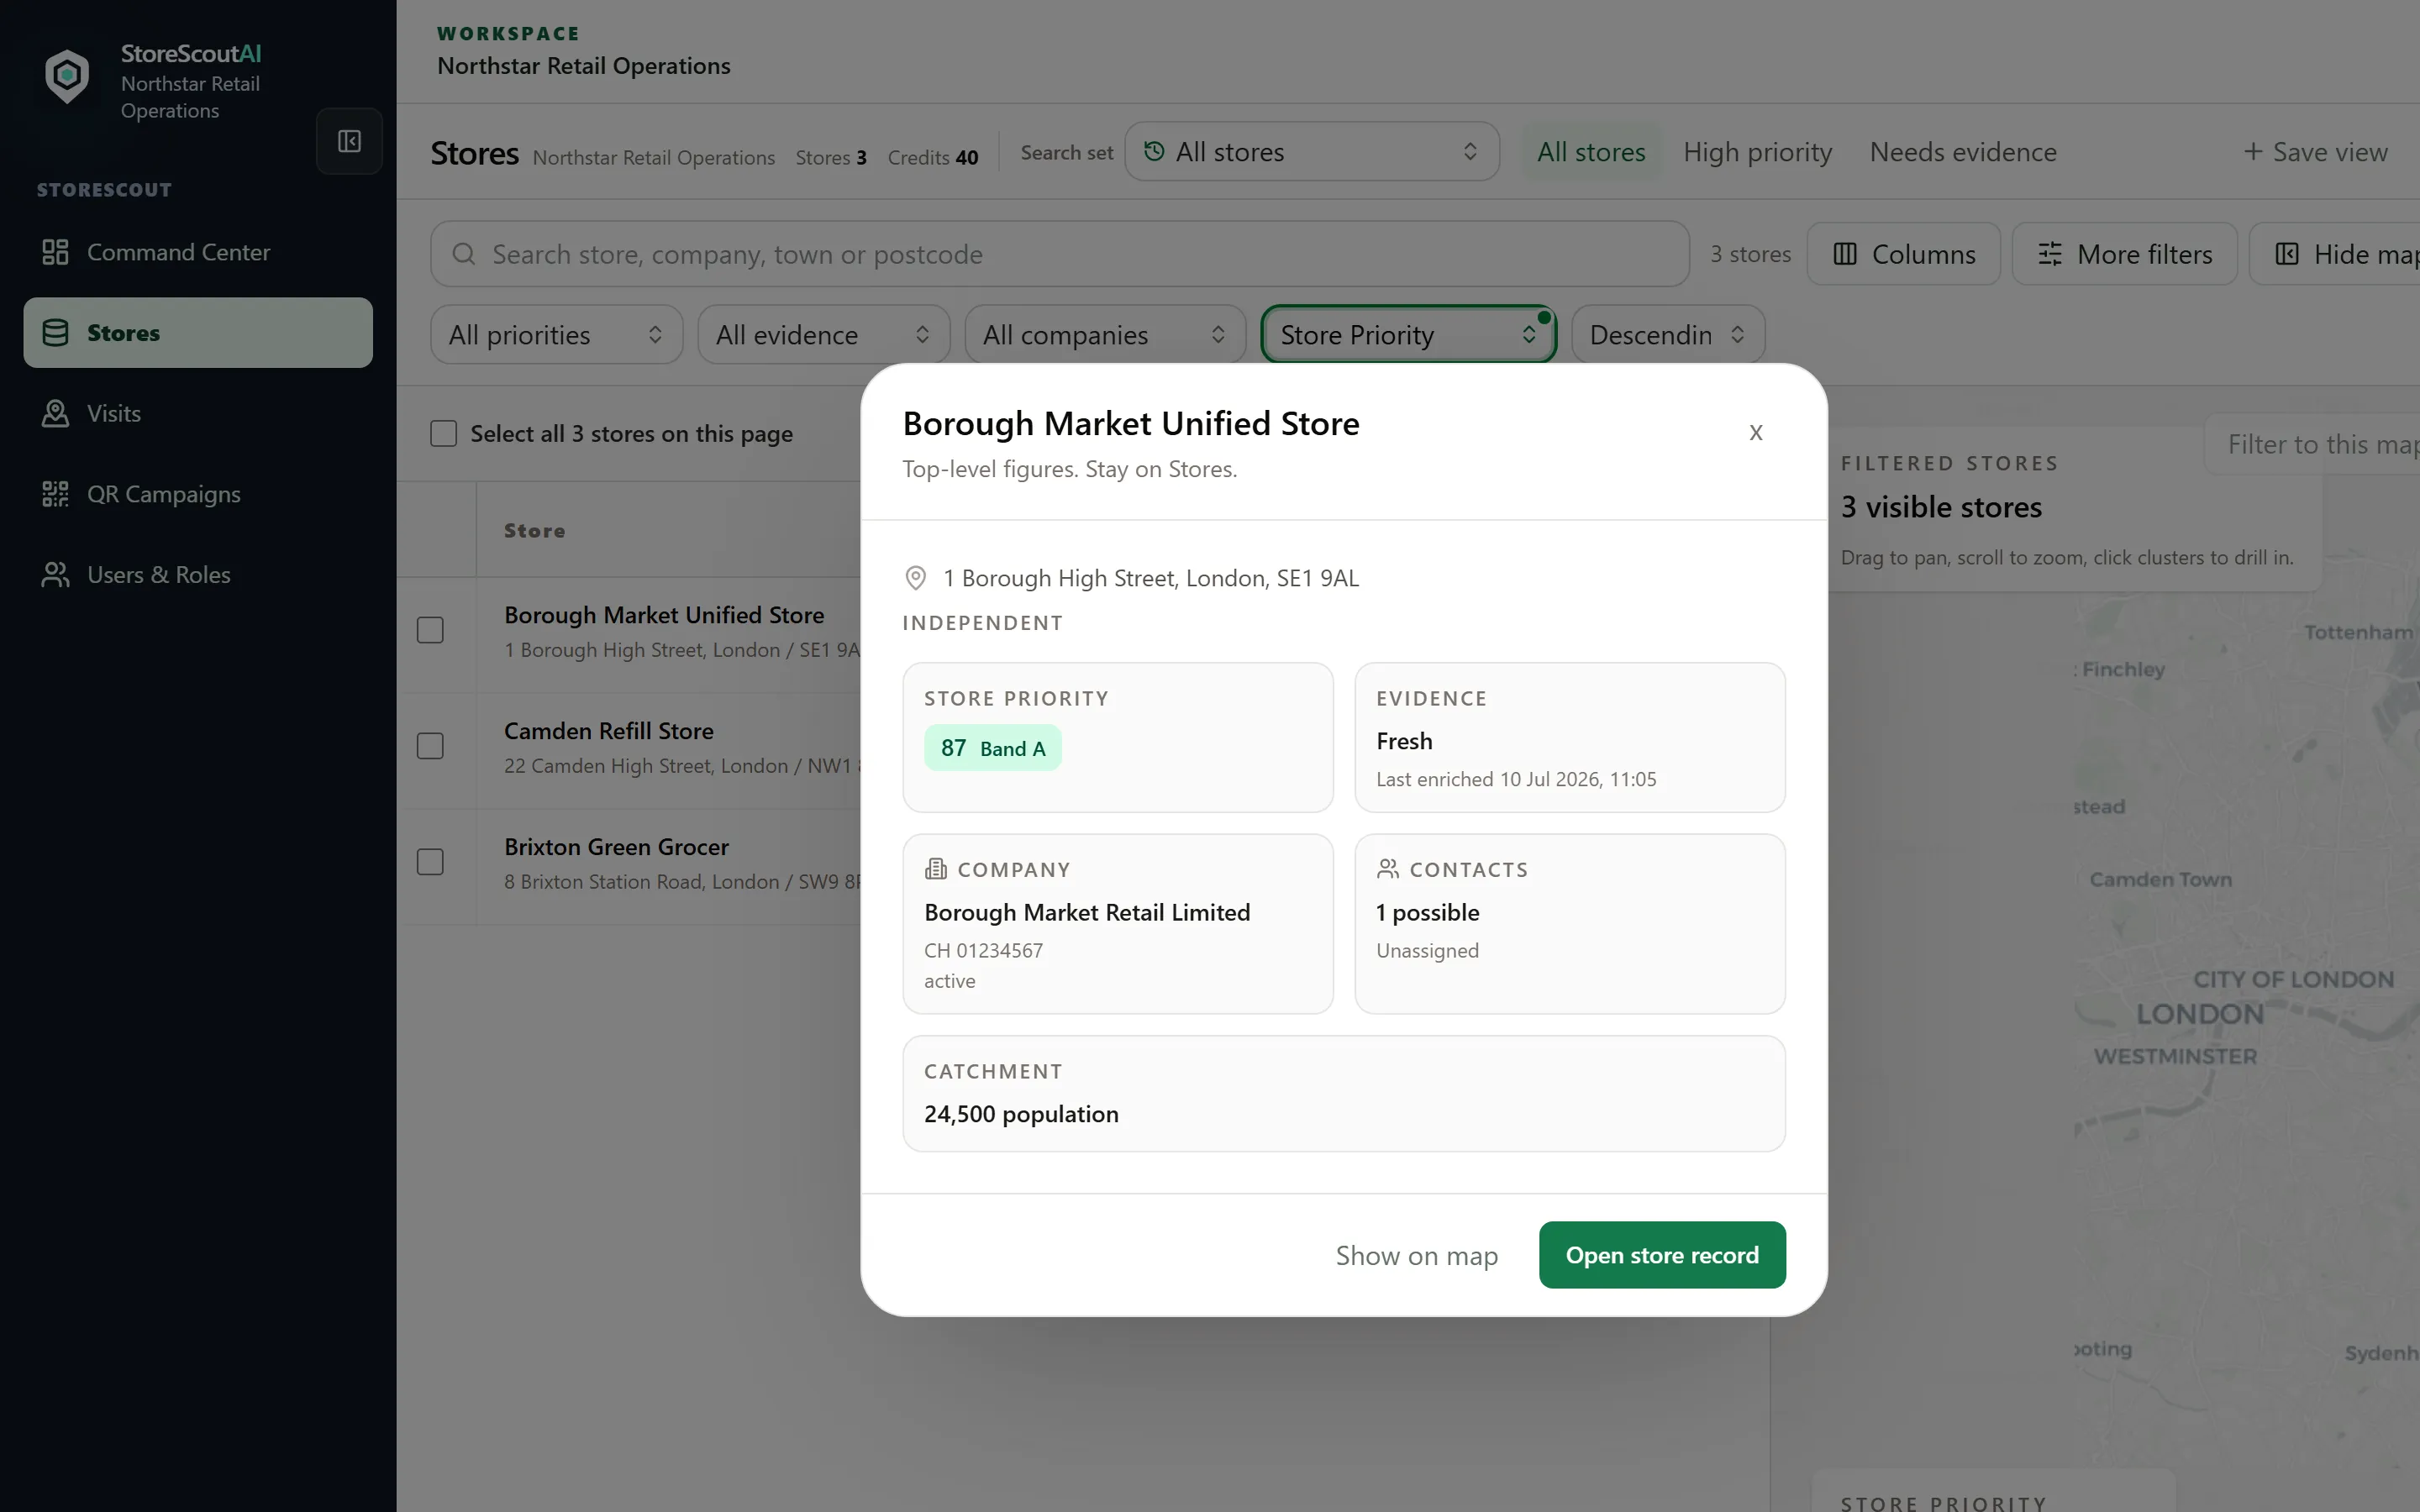
Section titled “4. Open one store (4 minutes)”Stores has two store surfaces: a preview (glance) and the full store record (the workplace).
- Click a row (away from the name and the eye) to fly the map to that store.
- Click the store name to open a preview (priority, evidence, company, contacts). Stay on Stores.
- Use the eye control, or Open store record in the preview, to open the full record. The first screen is the next task for that store — not Street View.
Details: Store profile and evidence.
5. Know Find, enrich, and export (2 minutes)
Section titled “5. Know Find, enrich, and export (2 minutes)”- Find stores (header) starts a licensed area search that saves results into your workspace (uses credits when configured).
- Enrich / refresh runs from a selection in the table — watch the operation banner for progress.
- Export works from a selection or list — read on-screen scope warnings first.
Details: Find and search, Enrich and refresh, Export safely.
Done when
Section titled “Done when”- You can open Stores and find a store without help.
- You understand that Store Priority is a guide for attention, not a legal determination.
- You know who manages users and credits in your organisation.